Analytics
Scheduling reports
Path:
- ANALYTICS
- REPORTS
- SCHEDULE
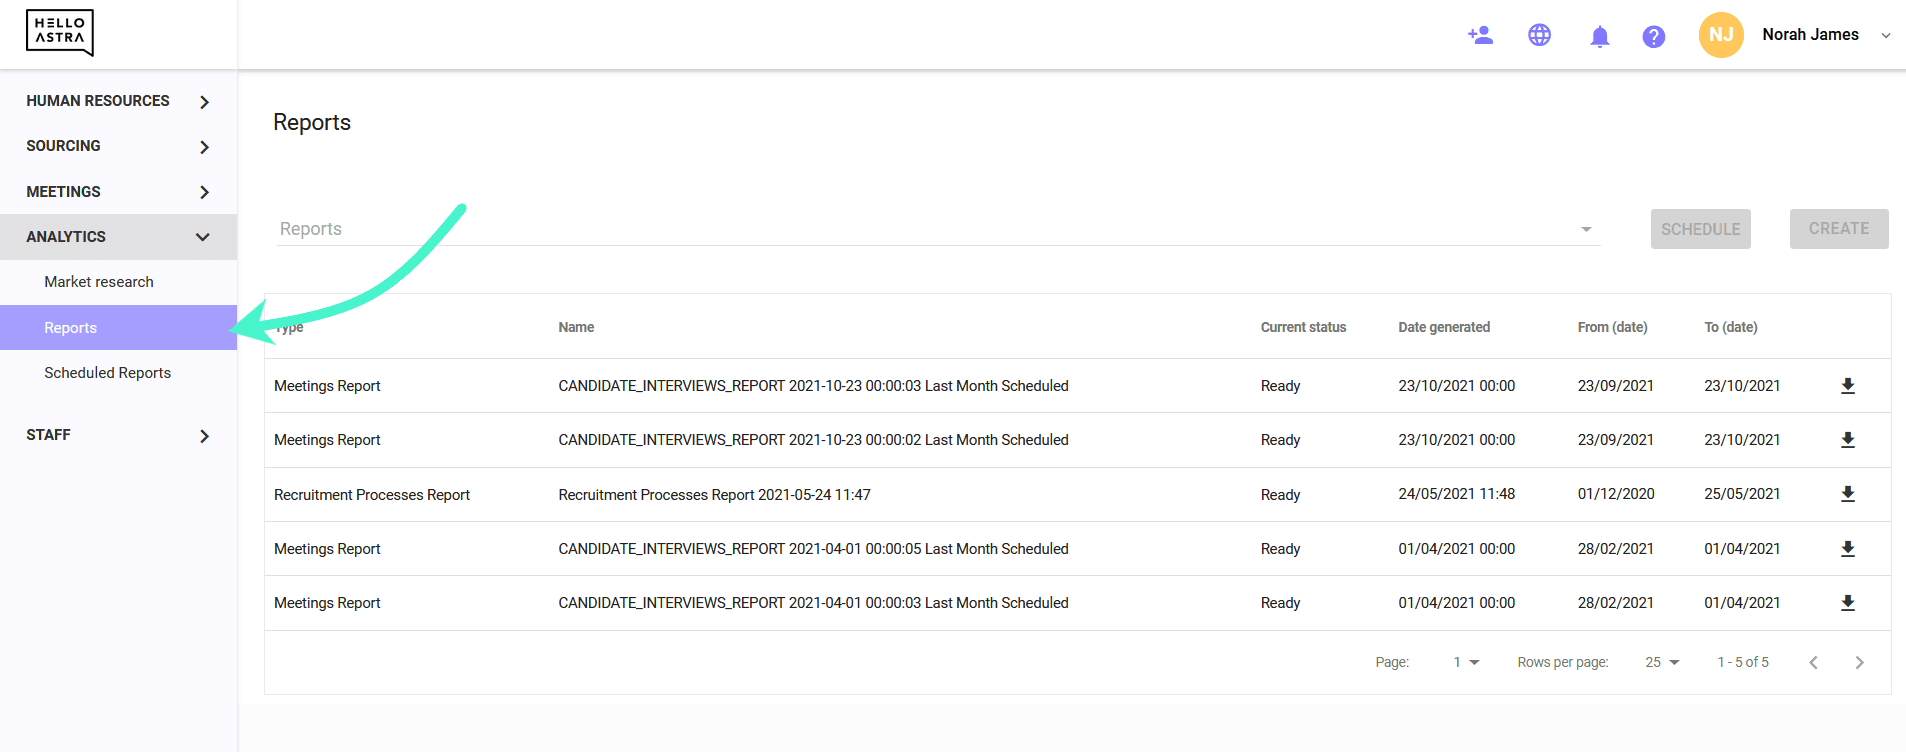
To schedule report generation, go to the Analytics tab, select the Reports tab from the menu on the left.

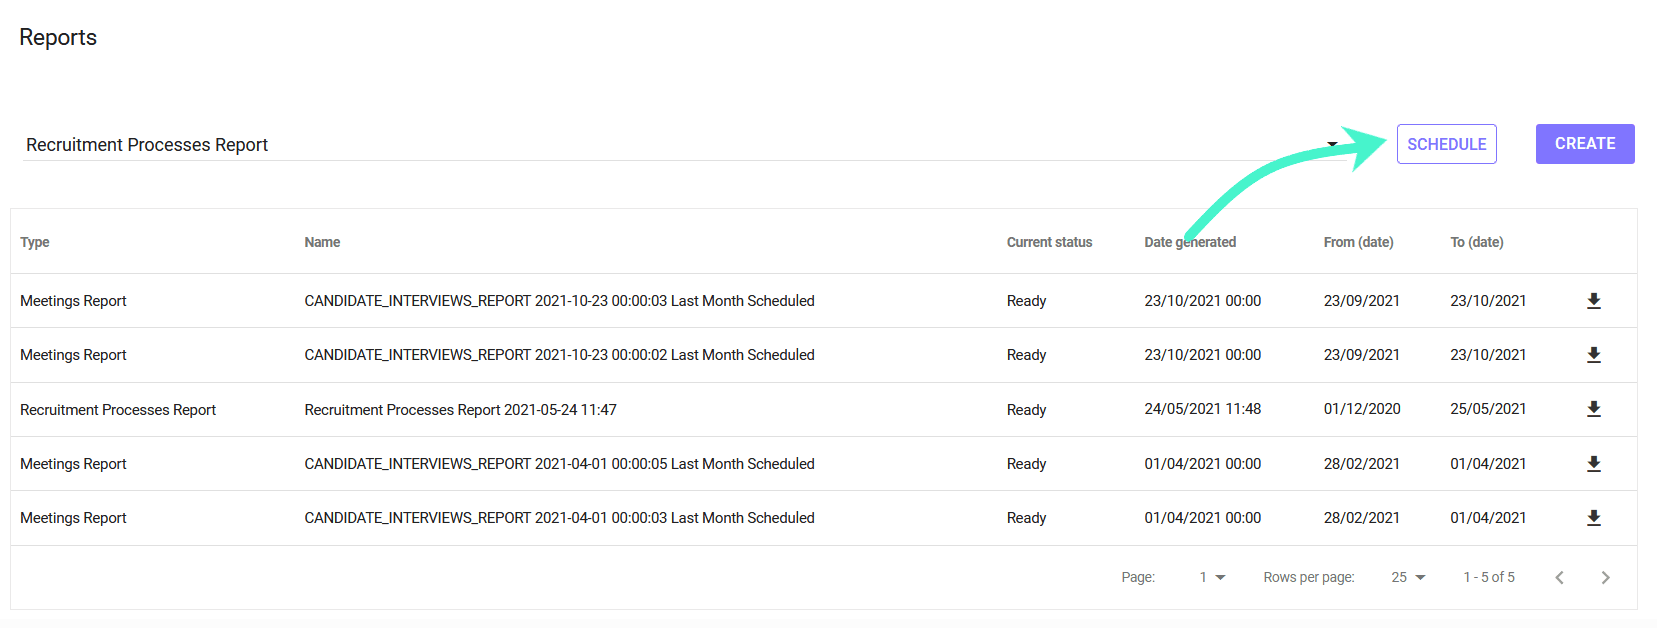
Then select the report you want to schedule from the list and click the SCHEDULE button on the right.

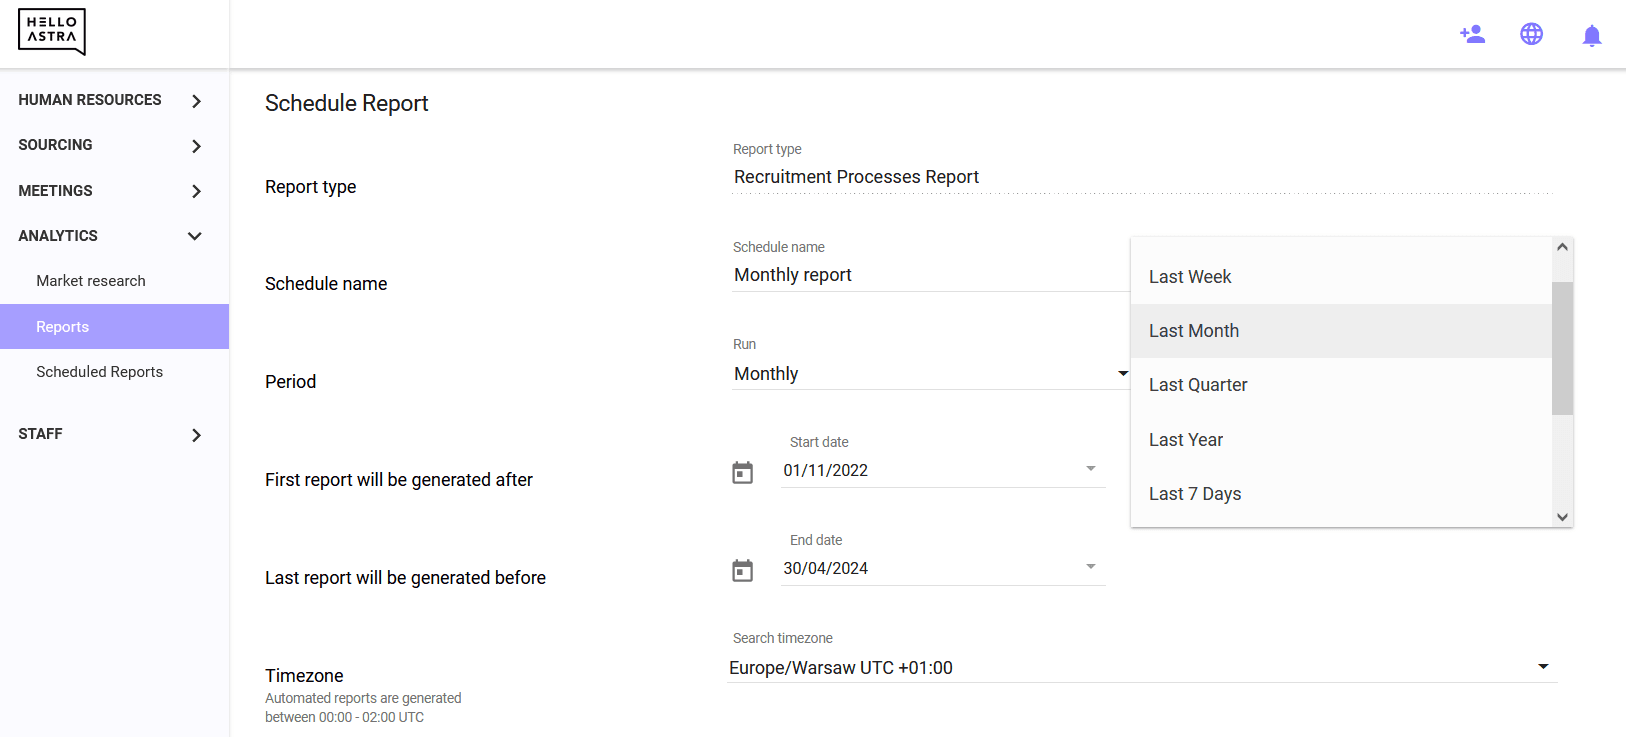
Now specify in report configuration. You can choose with what frequency and for what period we should generate the report, when we should start generating and when we should end it.

Then select the format in which we should generate the data. You can choose between XLSX and CSV. Choose how you want to receive the report - by e-mail or via webhook.
If you choose the Mail option, you must specify the address to which the report will be sent.

If you select the Webhook option, you must provide the URL, Header name, and Header value.

Then save the report settings by clicking SAVE.

Path:
- ANALYTICS
- SCHEDULED REPORTS
To see and manage all scheduled reports, go to the Scheduled reports tab.

If you no longer need to receive scheduled reports, you can delete them by clicking the trash can icon on the right. We have hidden the possibility of sending a test report under the three dots icon.
